


[Guide] Launching CAPELLA after reset
This guide is for you if:
- If your speakers and Hub have been completely reset
- Whether you want to install your entire Hub + Speaker + Remote + Wi-Fi system
PART 1 REMOTE CONTROL CONNECTION

1.Place the batteries in your remote control using the key supplied. Be sure to match the polarities indicated.
PART 2 STEREO HUB CONNECTION

1. Screw the antenna onto the Stereo Hub.
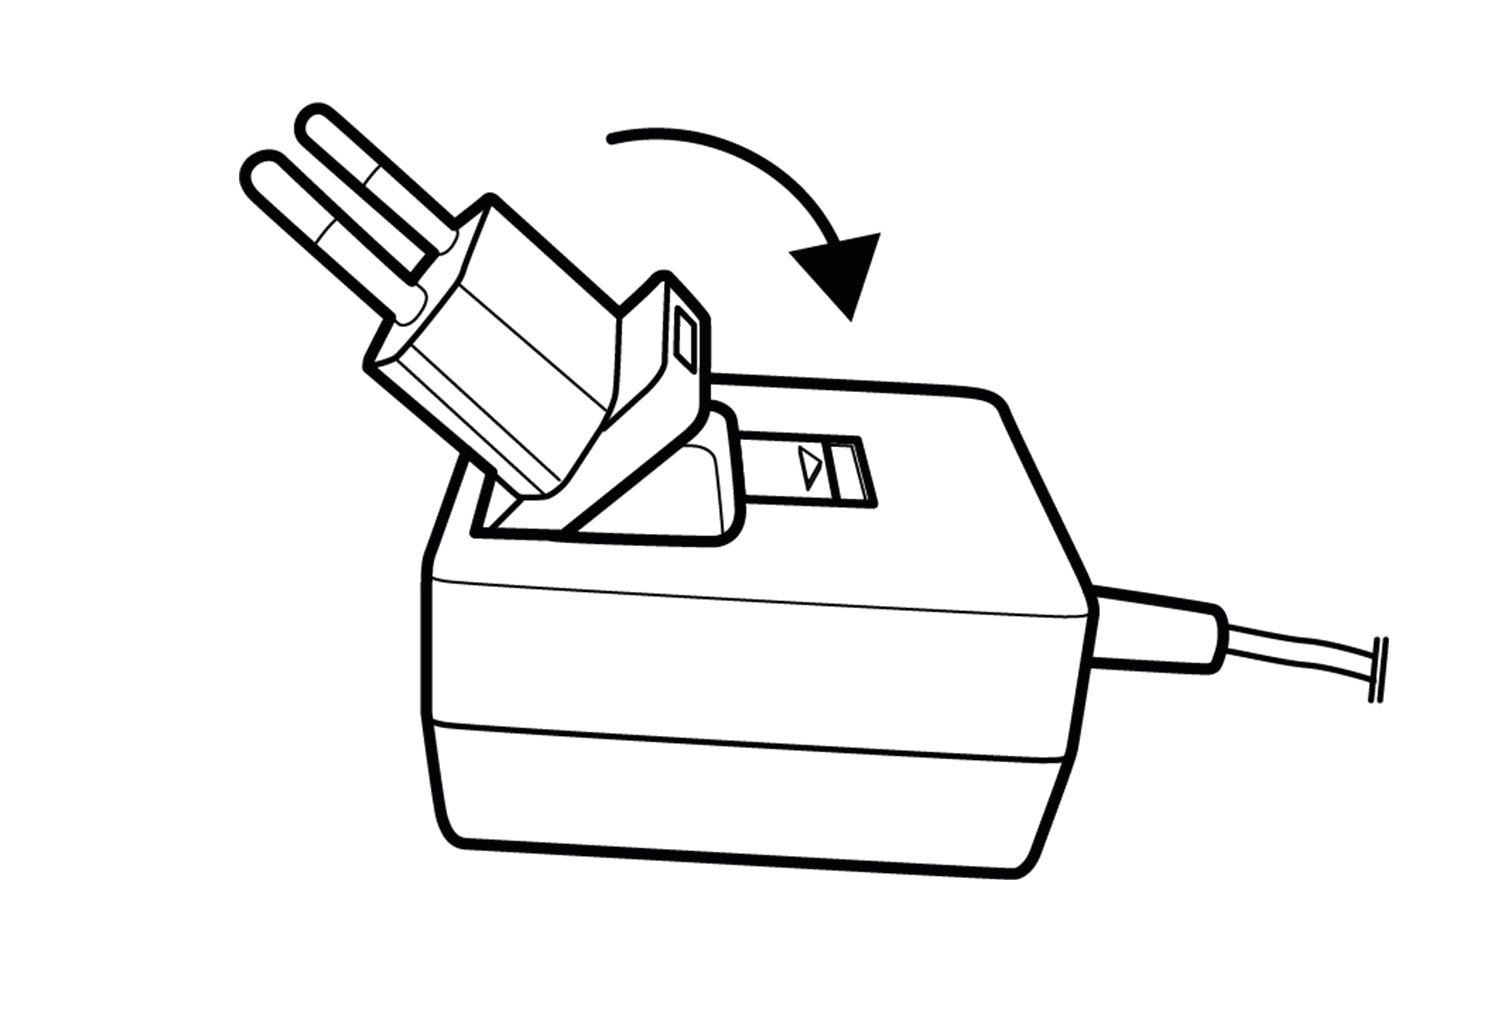

2. Select the connector for your power outlet.
3. Then connect the power cable between your Stereo Hub and your mains socket.
Stereo Hub begins its start-up sequence. Please wait for this sequence to finish. The WiSA LED remains off for 50 seconds, then flashes for 20 seconds before going off again. Extinguishing the WiSA LED confirms the end of the start-up sequence. You can now pair up your remote control.
Points to observe
- Do not connect speaker power cables at this time.
- Wait for the switch-on sequence to finish (approx. 70 seconds) before proceeding with the rest of the installation.
PART 3 PAIRING THE REMOTE CONTROL

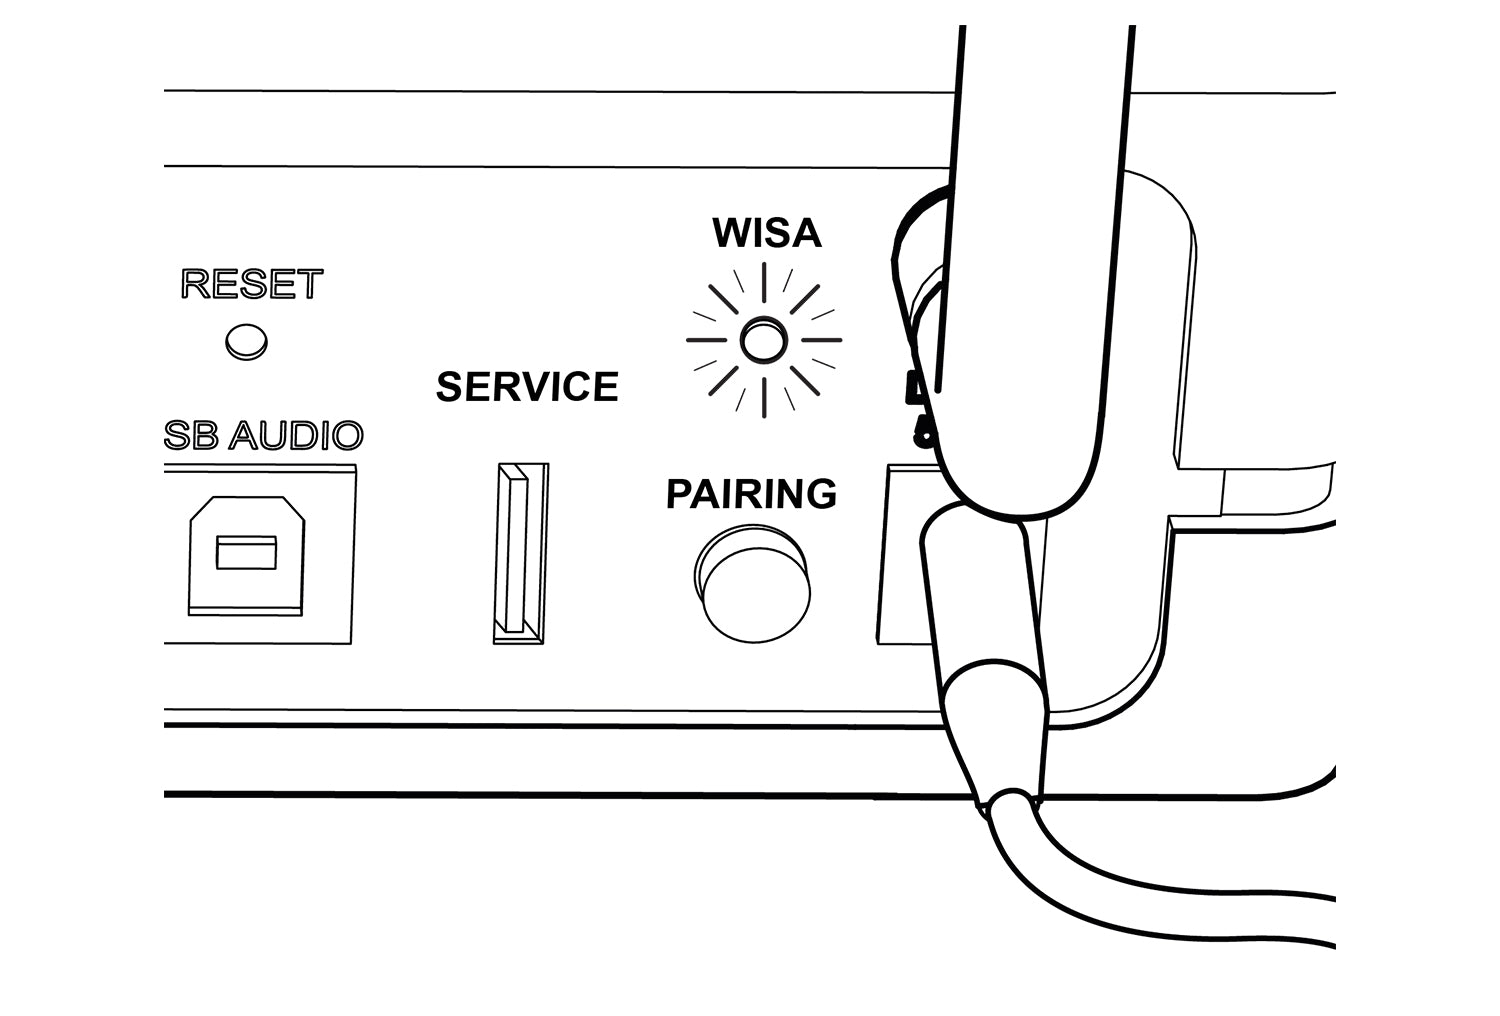
1. Press and hold the "PAIRING" button on the back of the Stereo Hub until the WiSA LED starts flashing rapidly. Release the button as soon as the flashing starts.

2. Then press one of the remote control buttons, and wait for the WiSA LED to stop flashing. Your remote control and Stereo Hub are now paired.
Pairing is confirmed by the WiSA LED flashing each time you press a button on the remote control.
PART 4 SPEAKER INSTALLATION

2. Connect your speakers to the socket using the supplied power cables.

3. The speaker start-up sequence begins. The STATUS LED flashes orange, then goes out and lights up blue for a few moments, before going out again.
4. Your system is now configured, and you can now enjoy the Bluetooth* source or any other physical source connected to the Stereo Hub. However, for optimal listening, we recommend that you connect your Stereo Hub to Wi-Fi, then install the associated application to take advantage of all available acoustic settings and corrections.

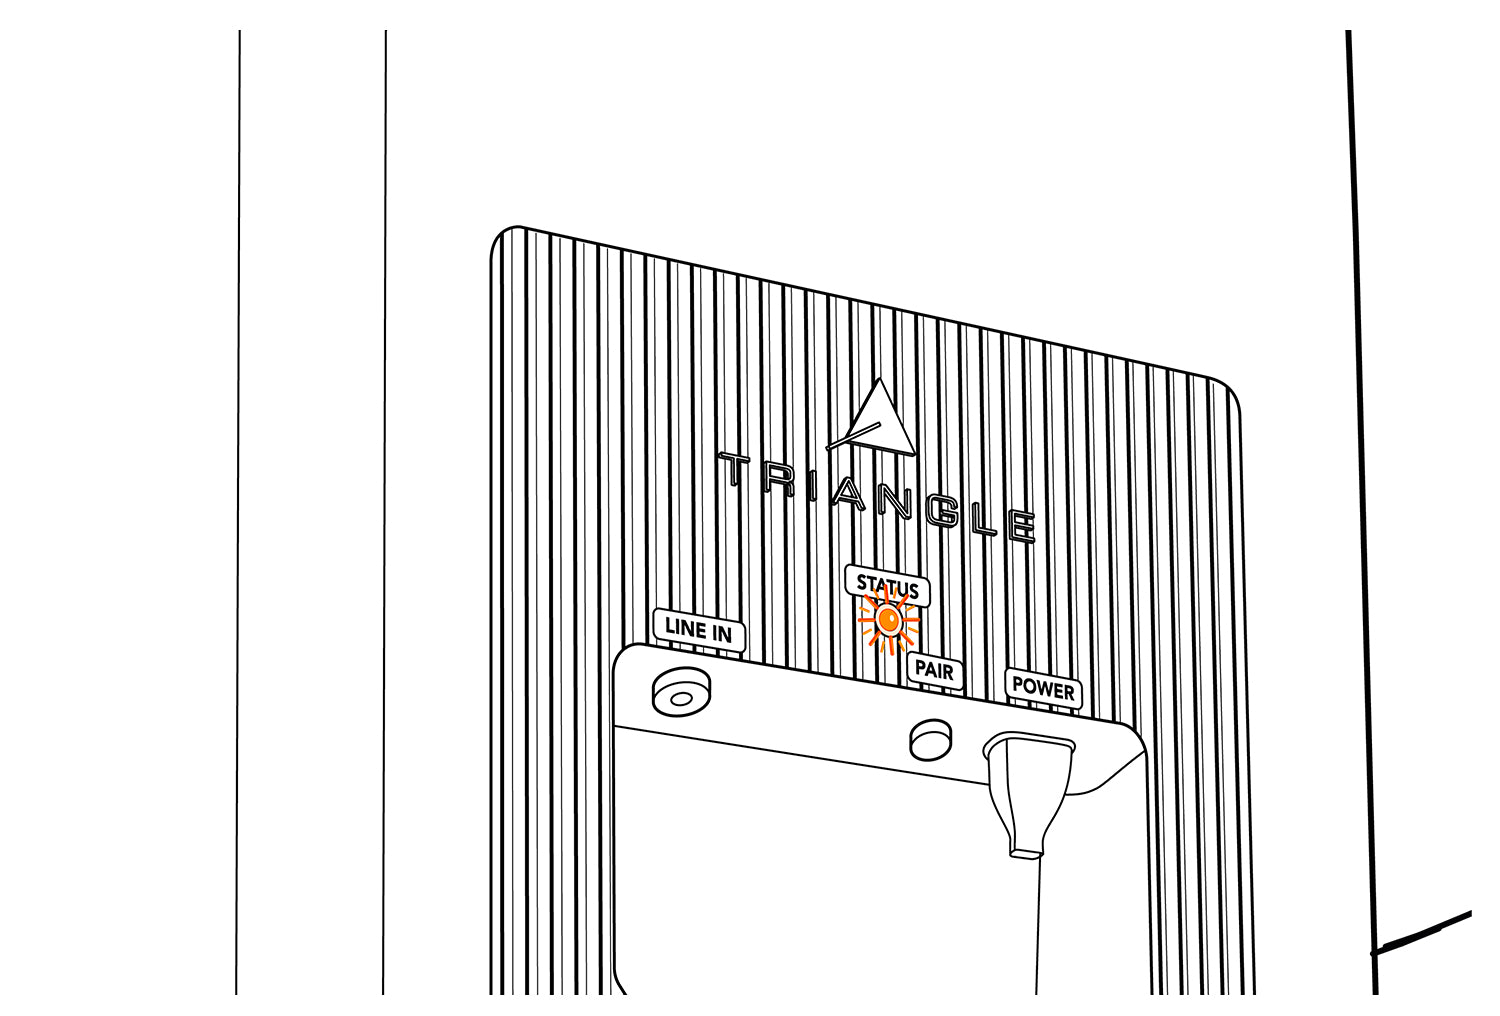
4. Press the "PAIR" button on each speaker for 3 to 4 seconds, then wait for the LEDs to start flashing orange rapidly.

5. Briefly press the "PAIRING" button on the back of the Stereo Hub once. The WiSA LED will start flashing slowly.
6. Pairing is validated once the LEDs on all 3 devices (the Stereo Hub and the 2 speakers) are lit continuously.
7. Position your speakers according to the left and right labels on the back. Then connect your Stereo Hub to Wi-Fi.
PART 5 WI-FI CONNECTION VIA GOOGLE HOME

1. The Wi-Fi LED on the front panel flashes rapidly, indicating that "Wi-Fi configuration" mode has been activated.
2. Adjust the volume from your remote control by illuminating 6 LEDs.

3. Download the "Google Home "* application onto your smartphone or tablet and follow the instructions below. Configuration is complete once the Wi-Fi LED has frozen (step 10).

3a. Go to the "Devices" tab. Then click on "Add a device".
3b. Choose "Google Nest device or partner".

3c. Choose "Home" then click "Next".
3d. Once Stereo Hub has been detected, click "Next".

3e. A beep sounds. Click on "Yes". If you still don't hear the beep, click on "Yes" and the test procedure will be repeated later.
3f. This step determines the name of your system on your applications. You can choose a suggested part name, or name it as you wish by clicking on "Add a part". Then click "Next" to confirm.
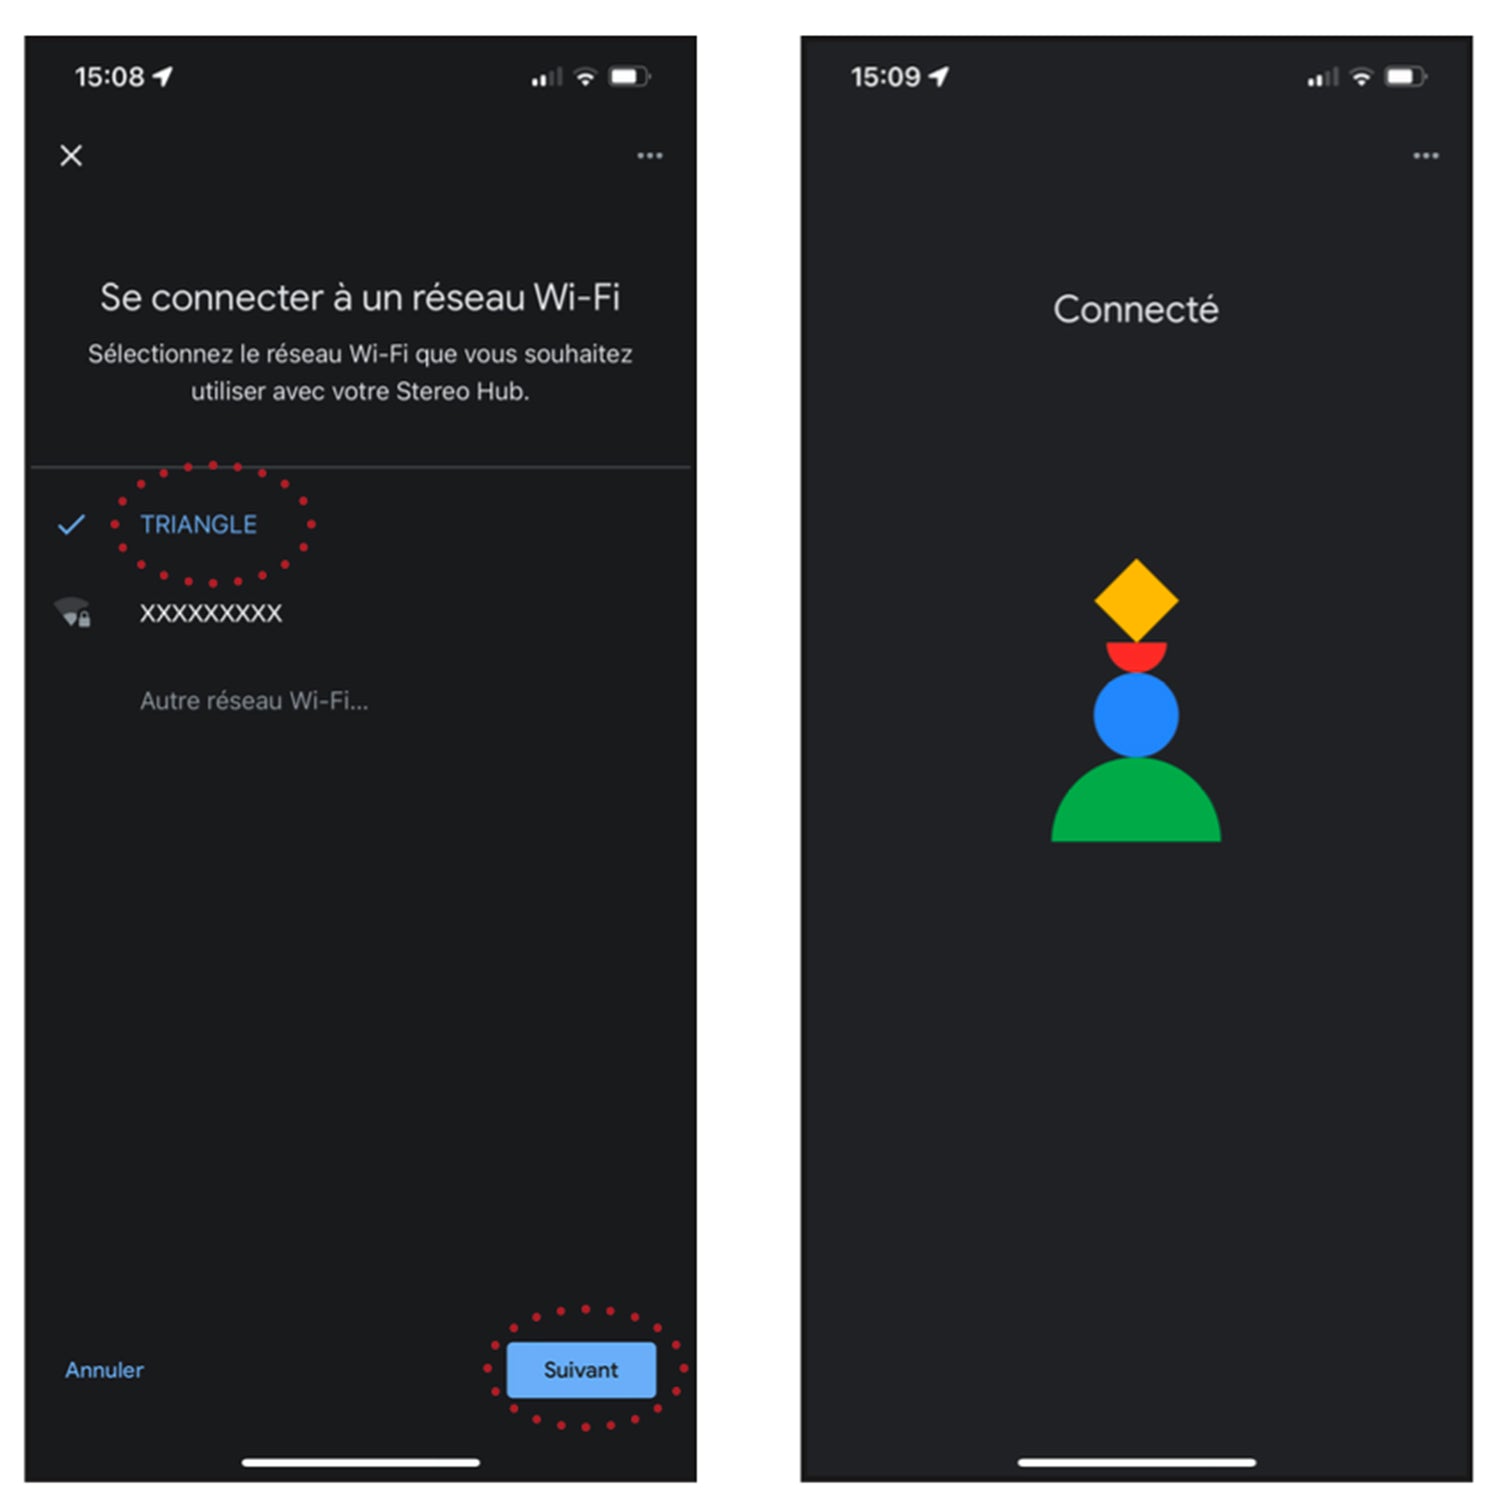
3g. Choose your Wi-Fi network. You may be asked for your Wi-Fi network connection password. Then click on "Next".
3h. Your CAPELLA system is now connected to your network.
Further information
- * You need a Google account to complete this step.
- If you still don't hear the beep, click on "Yes" and the test procedure will be repeated later.
PART 6 TRIANGLE CAPELLA APP
1. Go to App Store (Apple) or Google Play Store (Android) and download the application: «TRIANGLE CAPELLA»

2. Launch your application, then click on the icon representing your system.
PART 7 STEREO SETTINGS
If you've reset your system to default, your two speakers are configured and assigned as "Left speaker". To do this, you need to set them to stereo:

1. Go to the second tab of the application. Two speaker icons are superimposed on the left-hand side.
2. Click once on the icon  to display the 2 speakers separately.
Hold your finger on one of the icons to emit a sound on one of your speakers. You'll be able to easily identify left and right speakers.
3. Press and hold the sound-emitting speaker on the right to "drag and drop" the icon to the dedicated slot on the right.
Perform a final test by pressing each speaker in turn to emit a sound and check that they are correctly positioned. Your speakers are now configured for stereo.
Your speakers are now configured for stereo.
PART 8 AUTOMATIC CALIBRATION
Before starting Room EQ
- Make sure your CAPELLA system is switched on.
- After configuring the ZEN microphone, check that the battery is sufficiently charged.
- Switch on the microphone by simply pressing the action button, the LED quickly turns green (no operation is required if you're using your iPhone's built-in microphone). The Zen microphone is an accessory sold separately
- Then follow these steps from your application

Calibration sequence
Set up your microphone and get ready to take measurements in different parts of your room, as described above.

Then click on "Begin", the LED on your ZEN microphone turns red, the speakers emit a constant pink noise, and you have 60 seconds to take as many measurements as possible.
The procedure can be stopped as soon as the "Stop" light turns white, if you think you've covered the entire room.

Once the procedure is complete, a red frequency response of your speakers in your room appears. These disturbances on the curve, which is supposed to be linear, are mainly due to your room, and we're now going to correct them.
Click on "Calibrate". In yellow, the frequency response corrected by Room EQ. You can see the obvious difference between the two curves.
Then click on "Finished" to finalize the Room EQ measurement procedure.
By clicking on the small white circle below the Room EQ icon, you can activate or deactivate this setting during your listening sessions, and notice a noticeable improvement in your listening conditions.